Thursday, November 10, 2011

Project Post 13: Thankful Tree

My original plan for the Thanksgiving Season was to have a "Thankful Jar" - which works the same way as a Thankful Tree, except with the tree, the things we are thankful for are displayed, so I changed my plan and went with the tree.


I love traditions, and the idea here is to have this tree every year, for the members of our family to write things they are thankful for on little "leaves," and hang them on the tree, so that when we walk by and see a few of the "leaves," we are reminded to give thanks.


I sent several "leaves" to work with Tyler and asked him to bring them back to me filled out, and I filled out some myself. Since our only child is a year old, his dear 'ol mom filled a few out for him (we might break out the crayons and color on a few to hang later).


I was inspired by this tree, and also by several "Thankful Trees" that have flooded my Pinterest homepage over the last few weeks. It's such a great idea for a tradition, so I hopped on the bandwagon. Here is a look at some of my inspiration:
{Image via}


{Image via}


{Image via}
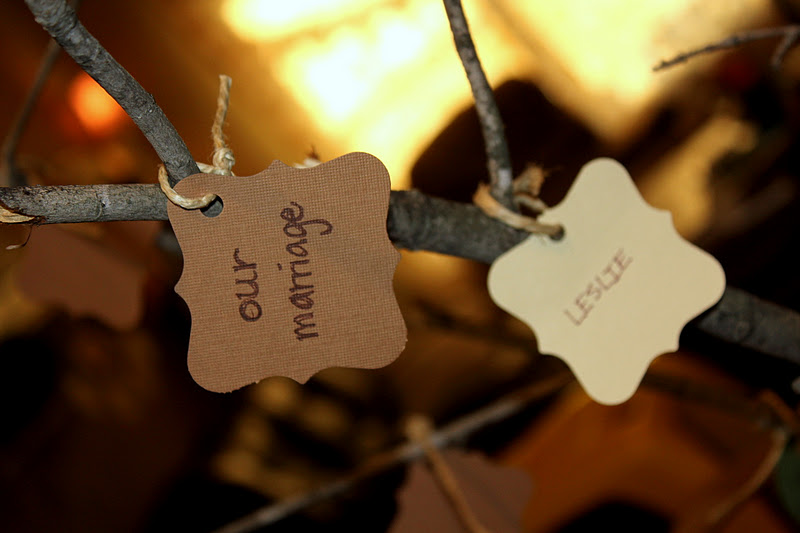
For our Thankful Tree, I gathered some sticks from our yard and put them in a large mason jar. Everything I used to make it I already had. The best projects are free ones! Here is our tree:




Monday, November 7, 2011

Project Post 12: Lamp Revamp

{Small lamp renovation}
When I bought these lamps, I sort of broke my own rule. Generally, if I want something - a piece of furniture or accessory, I will wait until I can afford what I really want and then buy it...and sometimes this takes years, but the goal is to accumulate nice things that I will want to keep for a long time, and not end up with a house full of cheap stuff that is always on a list to "replace." Shortly after we got married, I needed a "quick fix" in the area of bedside lamps, so I just went out and bought a couple of very cheaply made, cheap-looking faux-wood lamps, from a place-that-will-remain-nameless (hint: think better than Dollar General, but not quite Target). I also grabbed a couple of the only drum shades they had (this was before they got really popular and the stores started selling cute ones), and came home with two lamps and shades for somewhere close to $25.

Since we moved into our new house, our bedroom has been on the back burner. After living here two weeks, I found out I was pregnant, so the nursery became priority #1, followed by the other common areas in the house (because it's what guests see).

I'm just starting to think about working on our bedroom, but I couldn't stand the lamps any longer. Several months ago, I found a couple of burlap shades for a great price, so I brought them home. This past weekend I finally got around to my little lamp revamp, and I am happy with the results. I had some oil-rubbed bronze spray paint in the garage, and I took the lamps out back and got rid of the gross, gold, faux-wood finish. After it dried, I switched out the shades and my lamps were revamped!

{Closeup of the new shade - closeup of the new finish}

{Burlap shade inspiration, via Pottery Barn}
{Burlap shade inspiration, via West Elm}
{Bye bye, ugly lamps}


H A P P Y   M O N D A Y !

Thursday, November 3, 2011

Nail Spotlight - Special Edition {Birthday Camo}

Like I told you before, several months ago I typed in "camo party" on Pinterest, and got a whole page of results. The cupcakes were one result I pinned and planned to create, and this was another:


{Original source here}


Notice my Pinterest caption...and that is obviously no joke. So, I knew I needed to buy at least two colors (my adaptations of camouflage "dessert tan" and "olive drab" as I frequently hear my husband refer to them), and I knew I probably had a third color that would work out - a dark brown or something.


I ended up buying "Westside Warrior" by China Glaze and "A-Taupe the Space Needle" by OPI (they have the best color names), and I used "Naughty" by Orly (they do not have the best color names) for my third color. I think the results were great! I got a lot of compliments (at the party) and few weird looks (at church the next morning), and I'm positive my little one-year-old pumpkin really appreciated the effort his mom made for his party :)


{Like the trailer in the background? We are high-class around here}


I know this is a large assortment of pictures...but I wasn't able to capture how they really look (high gloss top coat = glare, anyone?), so I just took a bunch and hope at least one comes close.

Monday, October 31, 2011

Project Post 11: Camouflage Cupcakes


I don't usually file recipes under "project posts," but this one was a project for sure. We partied hard over the weekend, and I don't know what Levi thought, but his mom and dad thought the party was pretty perfect. Today I am sharing the birthday cake cupcakes.

A few months ago, I typed in "camo party" on Pinterest and believe it or not, a full page of results came up. This was one of them:

{Found here, originally here}

After I found this, I decided to make these instead of ordering a traditional cake. They were challenging to make and very time-consuming, but it was definitely worth it.

I made butter pecan cake with traditional cream cheese icing, but those are standard. To get the camo colors, you use food coloring. I bought regular green, neon green, and brown food coloring (the greens were bought at the grocery store, and for the brown I went to Hobby Lobby). The regular green was too bright, so I mixed a little brown with it to get it the perfect shade. The neon green was way too yellow, so I mixed regular green and a tiny bit of brown with it to get it the right shade. Here were the colors I ended up with after some trial-and-error mixing:


Per instructions from the original source, you put a tablespoon of each color in each baking cup and just swirl it with a knife. That girl had an easier time than I did. I put a tablespoon of each in each cup and the top color was the only one that would show no matter how much I "swirled." So I had to get a little more creative with some trial-and-error. Surprisingly enough, they ended up looking great!


I used traditional cream cheese icing (butter, cream cheese, powdered sugar), a few brown and green sprinkles, and the little cupcake toppers that I made. They were a hit!


So there you have it - my camouflage birthday cupcakes, idea courtesy of Pinterest. This was such a fun project, I decided to link up with Young House Love and Bower Power Blog for their Pinterest Challenge (Fall Edition). You can check it out Wednesday when the challenge ends. I submitted my chalkboard in their summer challenge, and you can see it here (#212 at the end of the post).


{Lovely hostesses of the Pinterest Challenge}

Friday, October 28, 2011

Party Invitations

I'm a sucker for paper products...which works out well for me that I have a photographer friend, Amy, who designs them. I waited until the last minute with Levi's party invitations - I had intended on having a little one year photoshoot (well, at 11 months I guess) and having his invitations made with those pictures, but that doesn't work out well when I forget to schedule it. So we initiated Plan B...and took Levi out in the backyard and took some snapshots of him.

Amy was gracious enough to use my snapshots and make me some invitations anyway (her pictures would have been ten times better!) and I couldn't be happier with them.


{Image belongs to Amy Dale Photography}

{Image belongs to Amy Dale Photography}
We are ready to party tomorrow! Have a great weekend!


Wednesday, October 26, 2011

Happy b i r t h d a y sweet L e v i !


Our pride and joy is ONE YEAR OLD today, and words (or pictures) can't describe how thankful we are to be his parents, how much joy he has brought to our life, or how much we love him!

We took him out last night for a little birthday celebration -just the three of us- before we party hard this weekend with family.


{ ONE }

{ Birthday ride on the carousel }

{ Riding "Cherokee Blue" }


{ Picking out some birthday boots! }

Thanks be to God for his indescribable gift! 2 Corinthians 9:15


.
Related Posts Plugin for WordPress, Blogger...