Showing posts with label pinterest. Show all posts

Tuesday, October 30, 2012

Project Post 28: Mudroom Wall

We moved into our house in February 2010, and I started brainstorming for this project shortly after that. After Pinterest launched and became widely used, I started finding lots of inspiration for this little project I wanted to tackle.

Here was my dilemma: our laundry room is also the walkway between the door to the garage (which is the door we use to enter the house 99% of the time; guests enter through the front door) and the rest of the house; meaning, it is a widely used, high-traffic area. It not only is a main source of traffic, but also used daily for laundry (I have a toddler, hel-lo), and up until a couple of weeks ago, it was the place we bathed my son every single day of his life (there's a huge tub-sink in there). I mentioned all of that to stress what a popular place this room is.


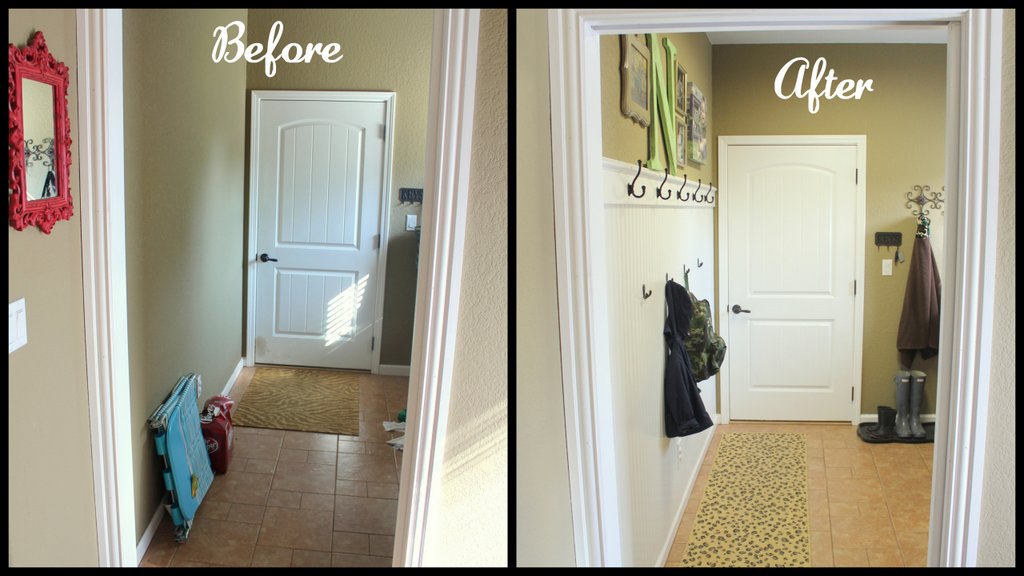
{Laundry room / walkway BEFORE}
You can see in the picture above that there is just a long blank wall on the left side of the room, and the doorway from the kitchen (there is a pocket door there, it stays open unless there is laundry going) and the door to the garage butt up against the wall so that there is no possible room to put a piece of furniture or any kind of organizational/functional anything there, without running into it every time you come or go. I really wanted a way to utilize this wall for storage or some kind of functional space. Our "landing strip" or "dumping post" for purses, diaper bags, and miscellaneous junk we bring in from the car was usually the kitchen table or island and it drove me insane. I wanted those things to have a "spot" out-of-site and not where we dine. The problem is now solved and it's beautiful!

Here is where my inspiration comes in. I saw a couple of these little projects in different posts on Young House Love, and the rest I found browsing Pinterest.

{Sources for 1, 2, 3}


{Sources for 4, 5}

I showed Tyler my inspiration pictures and he was on board and thought it was a good idea. After I pinched myself to make sure it wasn't a dream, I asked if we could do it that weekend and he said ok.......................(wait, WHAT?!) This was back in June and the reason it has taken me so long to share it, well, there is no good reason. It took me a good two months to get it painted and purchase a rug (yes, that's important) and take, upload, and edit some pictures.
We decided to go with bead board instead of doing the more craftsman-style option (which I do love) for 3 reasons:
1. There is really nothing about our house that is craftsman style
2. We couldn't just use 2x4s and paint the sheet rock because our walls are way over-textured (our painter called it a "Mexico house" and I absolutely agree - our drywall guys didn't listen)
3. Our cabinets throughout the house have a bead board panel so the bead board really works the best
 
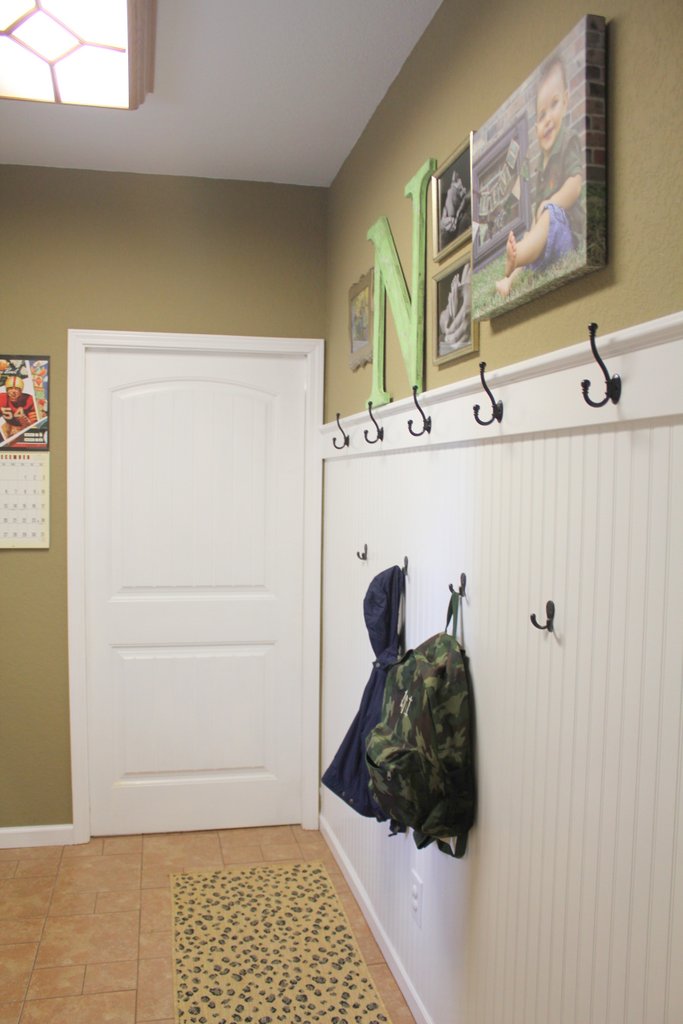
The pictures will explain the rest:
 
{Before}
 
{Before}


{During Painting}


Monday, October 29, 2012

Crock Pot Chicken and Noodles


I pinned this on Pinterest as a quick and easy weekday dinner, and that's exactly what it was. It was a great simple meal - good comfort food for cool weather. I made it for us one night, and the next two days my mom, brother, and I ate it for lunch until it was gone. We were getting ready for Levi's birthday party and my brother sent a text to ask if we needed fridge space -- offering to come eat the rest of the chicken and noodles. So, I guess it was good!

Ingredients:
3-4 boneless skinless chicken breasts
2 cans cream of chicken soup
1/2 Cup butter (sliced)
42 oz chicken broth
pepper, to taste
Egg noodles

Instructions:
Place breasts and butter in crock pot (I threw mine in partially frozen). Combine soup, broth, pepper and pour over chicken. Cook on low 8-9 hours. An hour before serving, shred the chicken and add uncooked egg noodles. I had a 24oz bag of noodles and added about 3/4 of the bag. Add less if you like it soupy and more if you like it really thick.

Monday, October 22, 2012

Halloween Candy Bark


We had Levi's birthday party over the weekend and it was such a great time! His party was "construction"-themed, which is a really perfect theme to have before Halloween because there are an abundance of orange, black, and yellow party supplies in every store.

One of the things I found on Pinterest and made for the party was this Halloween candy bark (the colors were perfect for our theme). I have never made anything like this so I wanted to try it - it was fast and easy! I did everything according to the recipe except the way I melted the chocolate. I just do it in the microwave and add a little shortening if it needs to be thinned out. I'll definitely be making this again for Christmas :) It was a crowd pleaser.

Ingredients:
1 lb. bittersweet chocolate, coarsely chopped
3 Butterfinger candy bars (or 8 fun size bars), roughly chopped
3 toffee candy bars (or 6 fun size bars), roughly chopped
8 Reese cups, cut into wedges
¼ cup honey roasted peanuts
3 oz. yellow and orange peanut M&Ms, coarsely chopped
3 oz. good quality white chocolate, finely chopped


Instructions:
Line a baking sheet with foil. Place the chopped chocolate in a heatproof bowl set over a pot of simmering water. Heat, stirring occasionally until the chocolate is completely melted and smooth. Pour the chocolate over the foil and smooth into a thin layer with a spatula. Evenly sprinkle the chopped candy bars, Reese cups, honey roasted peanuts, and peanut M&Ms over the melted chocolate. Press gently to adhere the candy to the melted chocolate. Transfer to the refrigerator and chill for 30 minutes.

Melt the white chocolate, again using the double boiler method, until smooth. Drizzle over the chilled candy bark. Return to the refrigerator and let chill again until the white chocolate is set, 3o minutes more.

Peel the sheet of chocolate away from the foil and break into irregular pieces. Store in an airtight container in the refrigerator until ready to serve.


Friday, June 29, 2012

Chicken Tortilla Casserole


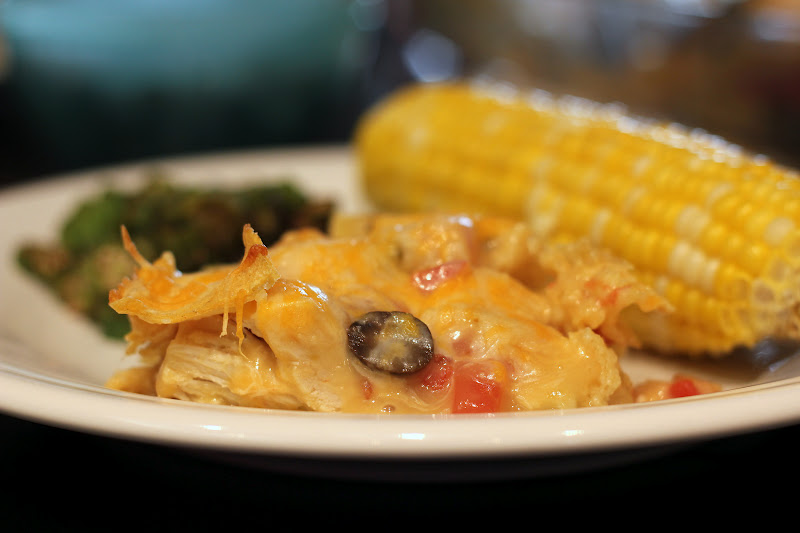
This is a very basic chicken casserole. My recipe was inspired by this one that I found on Pinterest. I made it last night because I had all the ingredients on hand and it was too hot for a trip to the store with a tired toddler. It would be great served with sour cream and salsa on top with a Mexican-themed meal. I had some fresh local sweet corn and okra to make so that is what we had with it. It's a great, tasty little casserole.

It calls for 3 cups of cooked chicken, and I had two large boneless skinless breasts in the freezer, so I cooked those and shredded them. In a pinch, or for a really fast meal, you could use canned chicken.


Ingredients:
3 cups cooked chicken
12 corn tortillas, cut into little pieces
2 cans of cream of chicken soup
1 can or rotel
2 cups (about) shredded cheese, cheedar or mexican variety
1 can of black olives (optional)


Instructions:
Heat oven to 350 degrees. Mix soups, rotel, olives in a bowl. Layer 1/3 of the tortilla pieces in the bottom of a 3-qt. baking dish. Layer 1/2 of the chicken over that. Pour 1/2 the soup mixture over chicken and spread evenly. Layer another 1/3 of the tortillas. Spread remaining chicken and then soup mixture. Top with remaining tortilla pieces. Bake for 40 minutes. Sprinkle cheese on top, bake for 5-10 additional minutes to melt cheese.


Thursday, May 24, 2012

Zucchini Bites


I found this recipe on Pinterest and it looked fun to me. We don't ever eat fast food (well, Levi and I don't...his father is on the road a lot and that is a different story - so I will say, "as a family" we don't ever do fast food) but one thing I have learned from the very few times Levi has had any fast food-types of food, is that the boy loves tater tots and fries.

The source I pinned from compares these bites to tater tots so it sold me. I, however, will not compare them to tater tots after making them because I think they are better. They are similar to tots in size and texture, but the taste is a lot greater. Squash and zucchini are two of my very favorite things - no matter how you cook them; a love stemmed from growing up with an abundance of fresh produce from my Papa T.A.'s 2-acre garden.

After making them, I also made a few tweeks from the original recipe to make them better. They're easy and quick and a great thing for my toddler to have as a snack or with lunch the next day (if we'd had any left!).

Ingredients:
2 C grated zucchini
2 eggs
1/2 small onion, FINELY diced
1/2 C shredded fresh Parmesan cheese
1/2 C regular bread crumbs
Salt & pepper

Instructions:
Grate zucchini and squeeze out all excess water into a paper towel. Combine all ingredients in bowl and mix together. Fill up each cup of a mini muffin tin, sprayed with cooking spray. Bake at 400 degrees for about 18 minutes, or until the tops are nicely browned.


Monday, April 9, 2012

Easter

We had a very busy, family, and fun-filled Easter weekend.

Friday night, Levi and I attended his little friend's backyard birthday party, while Tyler did the weekly mowing/yard work. Then we went out for a nice (but late) little family dinner and grabbed some Mexican food.

Saturday morning started bright and early with a 7am 5k race to benefit Special Olympics. My dad and I ran in that, while the rest of my family cheered from the sidelines a few blocks away snoozing in their beds. We then sent Levi to his grandparents' (where we were going later) and headed to the church for a rehearsal for the Easter service. After the rehearsal, we packed up and headed to Tyler's family's house to celebrate Easter with some charcoaled burgers (yum). Levi had his first Easter egg hunt (indoors due to rain).

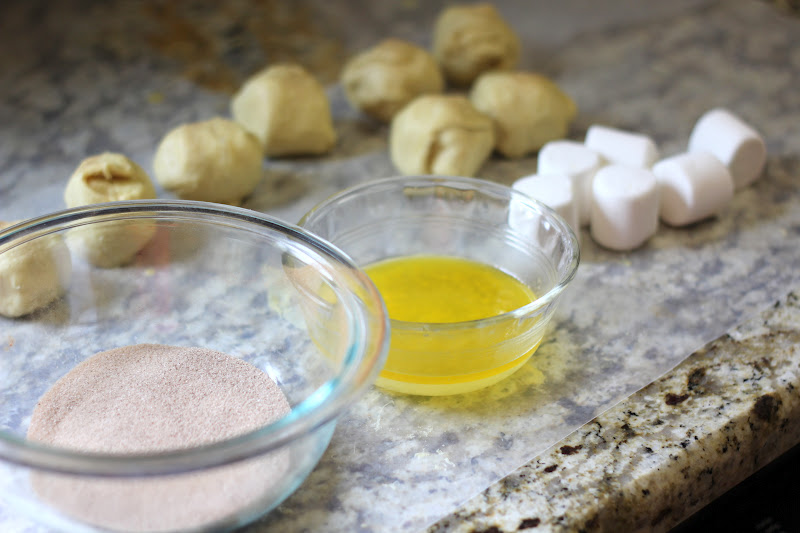
Sunday morning was our turn to provide breakfast for our class, so I decided there was never a better opportunity to make Resurrection Rolls than on Easter Sunday (we also made fruit kabobs to have a healthier option, but I failed to snap a picture of the rainbow colored treats). The rolls have been all over Pinterest, and the best and most simplified tutorial I found was here. I spent some time looking up the scriptures that corresponded with the Resurrection Rolls recipe and that was a fun way to reflect on the story on the morning of the Resurrection. After church I knew that no one would want to keep their pretty clothes on, so we headed straight to my parents' for a quick photo shoot before ditching the Easter clothes and digging into the turkey and dressing. Here are some snapshots from our weekend:


Friday, March 16, 2012

Project Post 22: Drip Pan Magnet Board

I saw this post on this blog, which led me to this pin:


The author in the blog post made her drip pan a chalkboard, but since we already have a large chalkboard (here), and the driveway is Levi's chalkboard, I decided just to leave it alone and let it be a magnet board (much less work).
The drip pan is from Wal-mart (automotive department) and is less than $10. There are a lot of things you could do with this! I love it - and so far Levi does too.

I made those "play" letters out of just wooden letters and scrapbook paper (both from Hobby Lobby). Don't look close because they bubbled up a bit from the glue/mod podge. I was going to make "learn" but decided "play" was one less letter - thus easier :)

Levi had fun with the magnet board. I kept hearing "this is fuuun," but unfortunately it wasn't my 16-month-old making complete sentences; it was my husband...as he was doing this:


And this is how we feel about that:


Related Posts Plugin for WordPress, Blogger...